Hello,
Almost two years, one beautiful daughter, one international move and seemingly endless exhausting days later, I am back to the blog. I have been crafting as an when I get sometime but nothing I felt worthy of a blog post than the card I am sharing now.
It is
My Favorite Things 2018 Card Design Super Star challenge that inspired me to create something innovative. So I combined a technique I wanted to try and stamps/dies I had.
I love travelling to natural and historical places. National parks are the most exciting vacation destinations in USA that we miss the most in India. It is not that India does not have national parks, but I believe, they are not as well organized for tourism or open for flexible planning. So, MFT's
Roughing It stamp set is my favorite when I want to channel my traveling spirit. And whatever I make with it rarely goes out of my hands because it becomes an instant after-the-fact memento of time we spent at those beautiful spaces. Here I am sharing another such card.
I have seen some cards made with Chibitronics kits. The first time I saw such a greeting card, it totally amazed me. But getting those kits to India was prohibitively expensive. I searched for alternatives and after some research I found some. Let me walk you through the process....
________
First I decided which images I will use from
Roughing It stamp set and their placement of the card. This is very important- images should go with your light based theme ( I have outdoor evening scene) and you need to decide exactly to place a light source to ensure proper the circuit and battery placement. I wanted to have light sources under the trailer, tent, campfire and star, so when the circuit is completed (with pressing on the battery) all four light up.
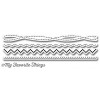
Now I did coloring of background and images separately from assembling the circuit. Based on the image placement, I created evening theme background. I have seen in Death Valley, sand dunes look most amazing at sunset. So for my sunset background, I decided to have some sand dunes and sunset behind them. I handdrew and coloured dunes and the sun. Then I masked them and created ink blended background with Distress Inks & Oxides in evening colours. Added a couple of stars with white gel pen and thin clouds with white gesso. Lower background is also blended similarly but I have added one hilly layer with stitched edges (
MFT's Stitched Basic Edges Die-namic Die) which will allow me to add trees. I stamped and coloured trailer, tent, campfire images with Prisma color pencils. I blended the colours with Spectrum Noir Alcohol Blender. To ensure that the four intended images light up brightly, I decided to cut out relevant area and replace it with vellum pieces. So I cut out windows from the trailer image, a start from dark part of sky, central area (reverse heart) from campfire and central part of tent images. I coloured the vellum pieces on backside with relevant colours with alcohol markers so the light coming out will have that coloured tint- yellow from trailer, pink-ish from tent and red-ish from the fire.
Now the circuit assembly which I did on a separate cardstock panel. Three things are needed- 1. power source, 2. light source and 3. conductor. So I got 1. button battery 3v, 2. light emitting diode and 3. Copper foil tape respectively. I never felt so happy to have Amzon in my life, I could not believe, I will find things I needed so quickly so that this card will see the light of the day...😄. Two things is must when placing the circuit 1. each light source will need
independent input-ouput line and 2. positive leg of the diode should be connected to positive side of the battery. Follow this strictly and the diode will light up. Make sure the diodes' legs are touching the copper tape paths, press them and tape them with the same coper foil tape to the circuit path. Due to size of the diodes (5mm), I had to place two layers of foam tapes on the sides and all round the diodes so that card front is well supported. Circuits are planned in a way that all the + meet at the corner of the cardstock which can then be folded over the battery (+) and all (-) meet farther in from the corner under the (-) side of the battery. Circuits will complete when the corner is pressed over the battery, same point will be marked on the complete card panel with a little diecut heart shape.
For final card assembly, I cut a window with
MFT's Stitched Rectangle Stax Die-namics dies in front card panel and adhere acetate so that the most of this campsite scene is visible from it. I also rubbed Ranger Micro glaze over colored background panels and images so they don't get spoiled while assembly and repeated pressing. Over the circuit panel I adhered coloured background panel. This panel also had area over the dioded's cut for better light transmission. Over this panel, I arranged images of trailer, tent, fire etc. I adhered this whole assembly to the inside of the card. Keep testing the circuit while doing all these in case any adjustment is needed. Majority of work is done!
 |
| Outside- through window |
 |
| Inside the card |
 |
| Lights in dark |
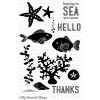
I added Nuvo Morning Dew in windows and body of the trailer for shine. I stamped the sentiment from
MFT's BB Magical Dragons stamp set and a festive bunting from
BB Up in the Air stamp set on the Acetate with Stazon Black ink, bunting colored with alcohol markers. I marked the pressing area on the card to complete the circuit. To give an indication of a button, I cut two shapes from
MFT's Hip Clips Die Set adhered a vellum circle and negative heart circle on that spot, I coloured the heart with alcohol marker and adhere on back of the acetate so it fits inside the negative piece on the background panel.
Thanks to MFTstamps, without such colourable, large, outdoorsy images of Roughing It stamp set, I would not have got an idea to create such a card.
Cheers!
Purvi

 I can't believe, I am actually able to create the third and final card for My Favorite Things 2018 Card Design Super Star challenge in such a short time. This one is for Coloring Virtuoso category.


 I can't believe, I am actually able to create the third and final card for My Favorite Things 2018 Card Design Super Star challenge in such a short time. This one is for Coloring Virtuoso category.